Learning Shader Structure
- Jan 20, 2023
- 3 min read
I've always known that shaders are an immensely large topic with lots of customization. Learning them from scratch is bound to be a massive undertaking, but it's one that I'm willing to begin. I've always admired shader artists and their work in graphics, specifically for video game effects, and it seems like a really neat combination of my love for art and interest in code with an infinite wellspring of content to explore and experiment with.
So, I've gotta begin at square one: the syntax of shader code and how it works (at least within Unity). I know some basics already, like that it's written in Cg/HLSL. and I understand loosely how their structure works and what they do.
The most common types of shaders include Surface Shaders and Vertex-Fragment Shaders.
Surface Shaders work by interpreting common lighting necessities like normals, albedo, subsurface scattering, and reflectivity through a predefined lighting model that is defined within the shader. All lighting effects will respond according to the rules of the model.
Vertex-Fragment Shaders do not include any built in understanding of how lighting is supposed to behave. A mesh's geometry is passed to the Vertex function, where information like coordinates and vertex position relative to itself and the world are received. These results are passed to the Fragment function which outputs a color for each given pixel, or fragment, within the area of the mesh that is being rendered. These shaders are useful for materials where light is distorted, like with water and glass, and do not follow the logic of surface shaders.
Alan Zucconi goes over in greater detail the intricacies of how shaders work, including things like the rendering queue, how ZTest works to discard pixels that are hidden and overlapped, and some common fields and keywords that are used in shader code like viewDir, screenPos, and worldPos for calculation. I have some hand-written notes about all of these things but otherwise I'm just going to jump into it by opening up an empty shader.
I'll be following along with Catlike Coding's tutorial on writing shaders from scratch.
Here's a very basic vert+frag shader written from scratch and annotated. All its responsible for is finding vertex positions to render the object shape, and assigning a Tint to its vertices.

the tint is controllable through the _Tint property, which is visible in the Unity editor.

When you pass the vertex positions through to the frag shader, you can do things like interpret each vertex position as a color.

Here, my vert function is outputting a float3 named localPosition (corresponds to xyz). This gets passed to frag, where it is returning a float4(RGBA) using XYZ coordinates (plus an A alpha channel set to 1). This will give you the classic UV RGBA render.

Using Structs to clean up the parameters
Structs are useful for cleaning up all the parameters that get passed from vert to frag, and keeping them all together in one place where they can be quickly accessed by the functions. Here's how the code looks using a Struct where the SV_POSITION and TEXCOORD0 semantics and their parameters are organized:

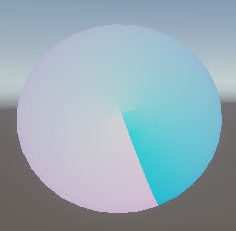
Using UV and textures
This includes a few new developments:
a new struct VertexData is organizing my position and UVs. for the vertices. This gets passed into vert. The interpolated UVs are set equal to the VertexData UVs, where the frag method can then set colors according to the vertex UVs.

Resulting is a visual of the sphere UVs, and the seam from top to bottom is visible.
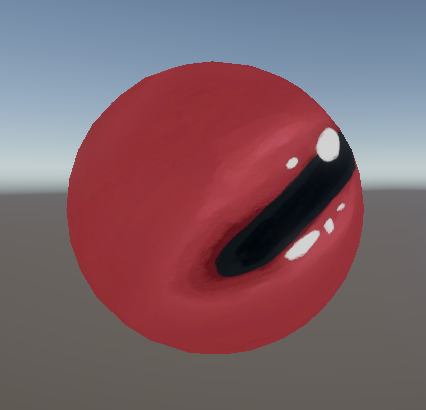
And finally, here's what happens when you add parameters for textures (paired with an old eyeball texture I made a while back.)

So, I now know some basics about how shaders work to display textures and colors, and how they coordinate with vertex positions and UVs. I'm going to continue following Catlike Coding's outline, and eventually get into creating specific visual effects including vertex manipulation.


Comments